This pattern is for you to create a pouch/case ideal for crochet hooks. The pattern is beginner friendly and worked in continuous rounds, the only stitches used are a single crochet stitch and a single crochet increase (U.S crochet terms). The pattern shows how I arrived at the design below, it can be altered for a longer pouch. The pouch shown below was worked in stripes using denim coloured yarn (Lion Brand Denim Yarn and 4.5mm hook). Good Pattern for stash yarn and scraps of your favourite colours.
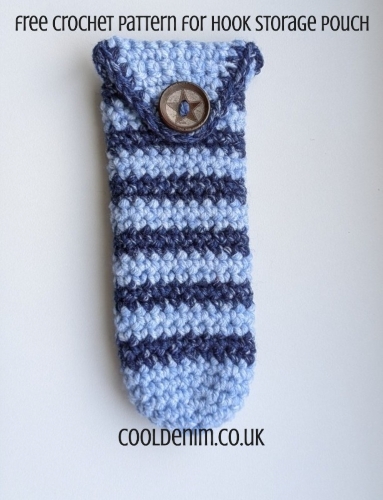
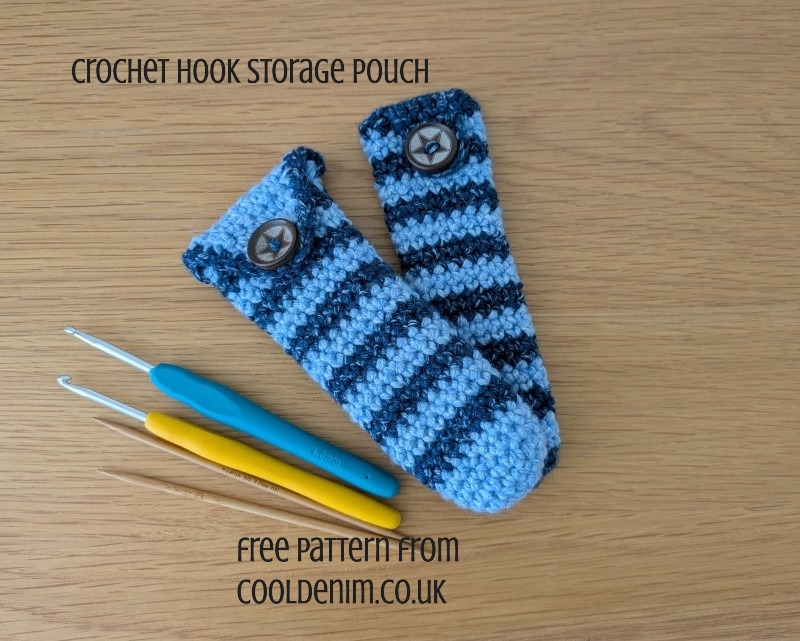
The images shows pouches made with lion brand denim yarn (Aran weight) on a size 4.5mm hook. Multi coloured yarns would work well as you would get different colours without having to change colours.
Techniques used:
- SC – single crochet (pattern written in US terms)
- Inc – increase by crocheting 2 stitches into the same stitch
- Mc – starts with a magic circle or the method you use to start a circle in crochet
- Worked in continuous rounds using a marker for reference.
- Colour Change every two rows
- ch1 – chain 1
- Images used Lion Brand Denim Yarn with 4.5mm hook – my button is 19mm
Use any stash yarn you have, the yarn shown is classed as Aran Weight (UK) Worsted or Heavy Worsted (US) 10ply. Recommend using a hook half a size down to what is recommended on the band.
Instructions and Method
Start by making a magic circle with 6 stitches (shown starting with the lighter colour). Use a marker to count rows if needed.
Round 1. Increase in every stitch (12 stitches)
Round 2. (SC1 stitch and increase in next) repeat this 6 times (18 stitches)
Round 3. SC4, increase in next stitch, SC8, increase in next stitch, SC4 (20 stitches)
Round 4. SC20
Round 5. SC20
Round 6. Change colour to darker colour SC20
Round 7. SC20
Round 8. Change colour to lighter colour SC20
Round 9. SC20
Repeat rows 6,7,8,& 9 – 4 more times
Repeat 6, 7 & 8 once more – you are now ready to proceed to the next part which is the fold over top. (you will have 6 darker stripes and just completed a light round)
– Stay with the lighter yarn
SC6, chain 1 and turn (for the rest of the pattern after turning go into the second stitch from the hook)
SC11, ch1 and turn
SC10, ch1 and turn
SC9, ch1 and turn
SC8, ch1 and turn
SC7, ch1 and turn
SC6, ch1 and turn
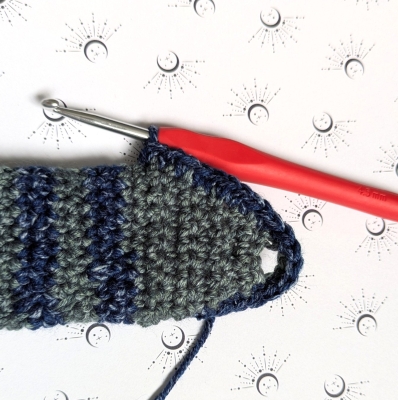
SC5 turn and chain 4 slip stitch into the last stitch on this row so you have made a hole/loop which will be for the button. See images below. Fasten off .
Join the darker colour at base of the flap/fold over part as shown below and work around the edge with a Single crochet working into and around the top edge of the chain 4 . This leaves a hole for the button. Continue round to the end of the flap and fasten off. Sew in any ends.
Sew on a button to compliment your yarn.
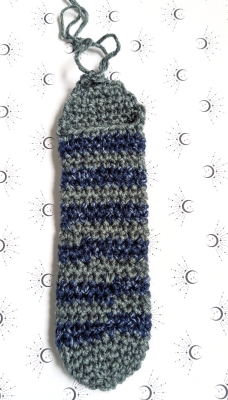
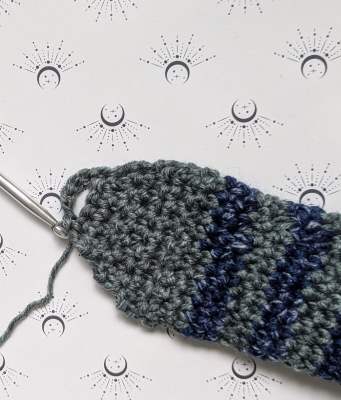
Crochet pouch showing stripes and start of the flap/fold over part.
Chain 4 and slip stitch into the last stitch to make a loop.
Work around the edge with a single crochet and into the chain 4 stitches to leave an open loop.
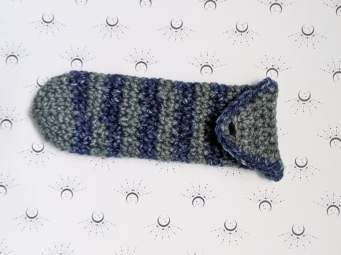
Ready to add a button – make sure the button is the correct size to go through the hole, mine was 19mm.
Enjoy your hook pouch. Its really useful for travelling or to keep your favourite and most used hooks separate.
© copyright cooldenim.co.uk 2026; all rights reserved. Design: creativeneats. Content not to be shared or used without explicit permission from cooldenim.