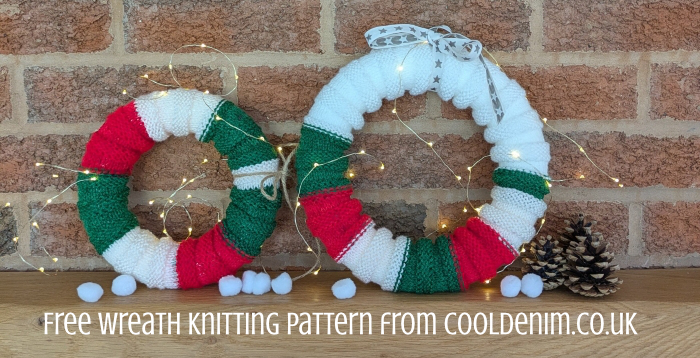
Pattern and Instructions to Knit your own festive textured Wreath. This pattern is suitable for plain, striped or multi yarns – perfect for hanging as it is or to decorate and embellish further.
Using yarn you may already have this pattern can be adjusted to use most yarns (shown using dk/double knitting yarn and 4mm needles). A beautiful personal decoration to display and be proud of, make it your own – plain for a simple and elegant look or embellish further with other knitted decorations. Images at the bottom of this post for inspiration.
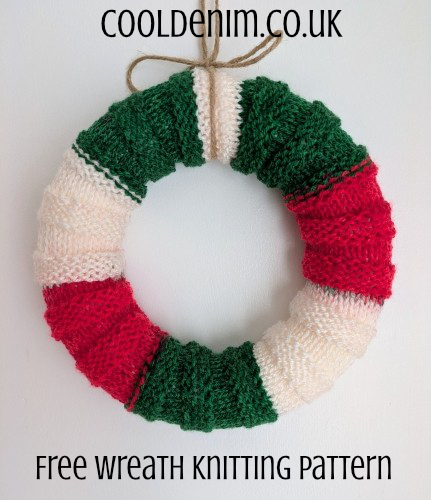
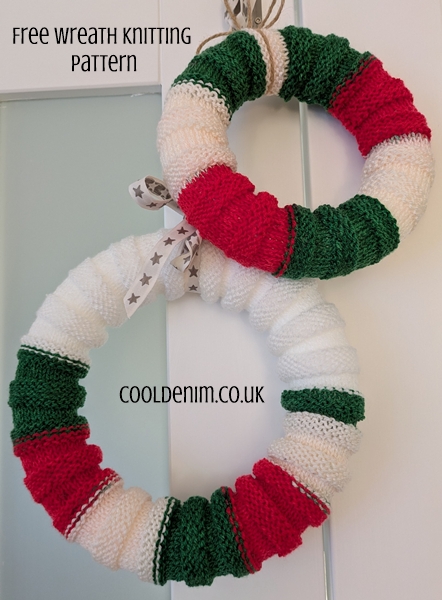
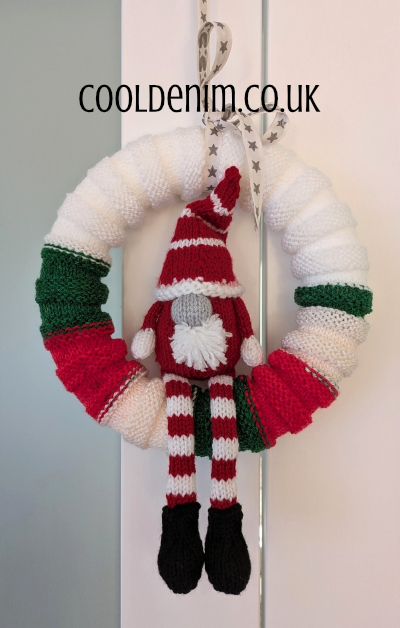
The image above is knitted with James C Brett Swurlywurly “Christmas Cheer” (DK Yarn/8ply). The image below (larger wreath) has this same yarn at the bottom with plain white at the top. The texture shines through in any yarn and is also a good base for further embellishment. It may seem and look like a long knit but it soon knits up – its a straight piece of knitting and an easy pattern to follow.
Reading your Ball Band/The technical Part – I am doing the simplest of calculation based on the tension stated on my ball band, which is a good place to start. (This is a rough calculation to help – so check your ball band). Honestly if its not working out you know very early on within minutes of straight knitting so its no big deal to start over.
My Ball Band tension stated 22sts is 10cm (wide) on 4mm needles – Measure around the ring (circumference) as this is the part we are covering, mine measures 12.5cm. (it is also a whole ring not one of the flat back ones and is 20cm across) Use inches if that’s what you are used to, most labels show both.
22sts divided by 10 = 2.2 this gives you an idea of the stitches needed for 1 cm. I need an extra 2.5cm in addition to the 10 cm so 2.5 (cm) x 2.2 (stitches) = 5.5. I am rounding it down to be 5 sts (better to have a slight stretch to meet). Stitches casted on were 27 (22+5) on 4mm needles. I’m not adding any extra stitches for seaming.
The pattern – Worked in blocks of 5 rows of stocking stitch then reversed to give you the nice rippled texture which will gather around the ring and bunch up as it wraps around.
( Row 1: Knit all stitches. Row 2: Purl all stitches. Row 3: Knit. Row 4: Purl. Row 5: Knit.) these 5 rows are then repeated so:
( Row 6: Knit. Row 7: Purl. Row 8: Knit. Row 9: Purl. Row 10: Knit)
Because of the extra knit rows the pattern is reversed and changes to either side to give the ribs/ridges. Repeat these rows to the length needed to meet around the outside of the ring. After knitting a small length check the sizing – image and details below.
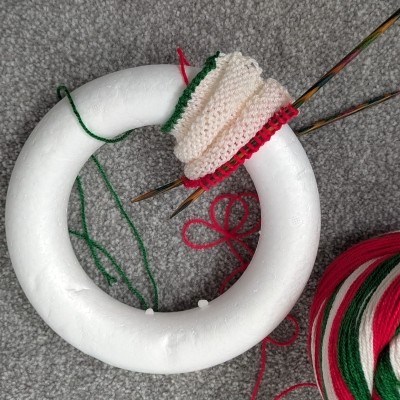
Wrap your length of knitting around the ring. The knitting should meet but not be overstretched as it will loose its texture and the ring will show through. This is the time to make any adjustment to the amount of stitches needed for the ring you have – the same amount of time would of been spent knitting tension samples so if you need to start over its better now before you have knitted too much.
Assembly and Sewing instructions
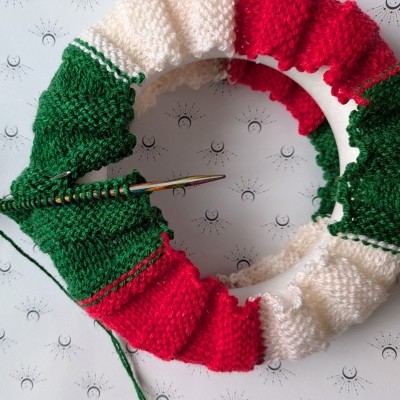
Your piece of knitting should meet when wrapped around the outer part of the ring, it should meet comfortably without having to stretch it too much. (Image Above)
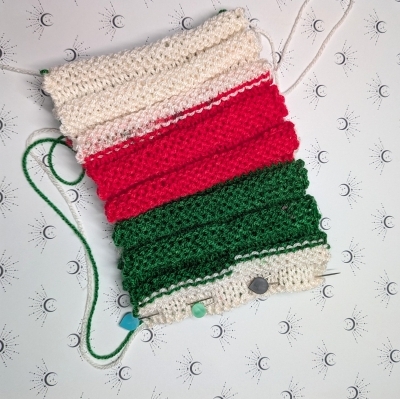
Join the cast on edge to the cast off edge (image above), and then turn so the seam is facing inwards. There is no right or wrong side to the knitting so if using a multi yarn and prefer one side to the other take this into account before sewing the seam.
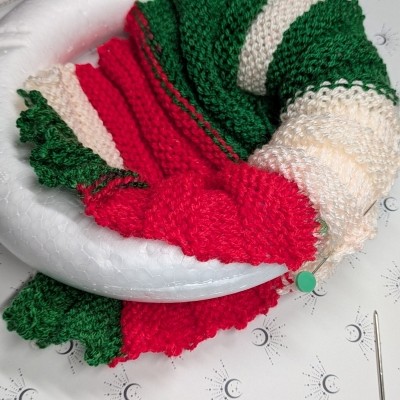
This open sided tube now stretches around the ring and the edges need to be joined. The knitting does tend to slip, I used pins on a section to hold in place ready for sewing.
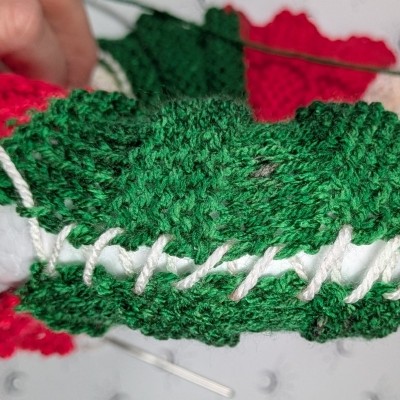
Thread a needle with a length of knotted yarn leaving the tail after the knot. Using big stitches almost like tacking stitches work round joining the edges of the knitting as in the image above. Sew a section at a time and then pull the stitches up, if the stitches are too small it will be difficult to pull up. If you are familiar with mattress stitch you could do this too, I am making it with a simple stitch to make it accessible for all levels.
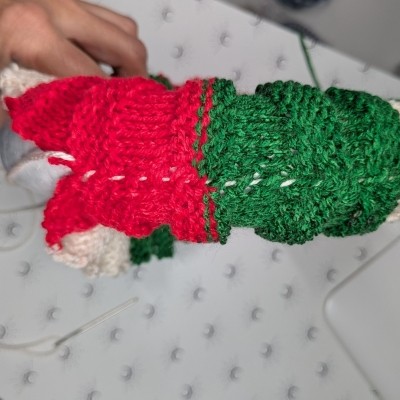
Work in small sections at a time pulling up as you go – image above. Sew all around to where you started. Feed it round the ring with your hands so it forms natural gathers around the circle, move the seam to the back. Pull up the two strands of yarn making sure you are happy with the distribution and knot this firmly. (Next Image)
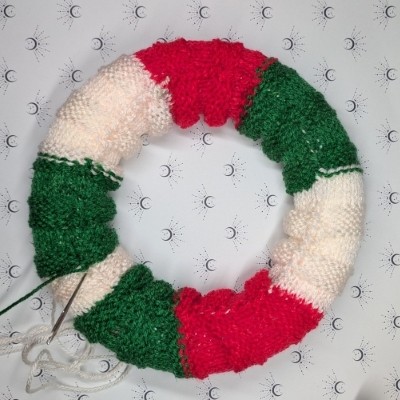
Image above – Knot the yarns together to finish and make any final adjustments with your hands. Turn it over and admire your creation!
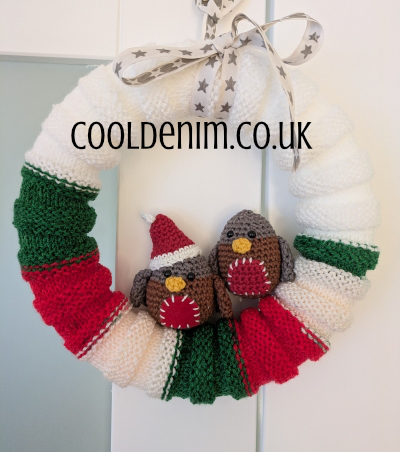
Wreath showing crochet robins, pattern available here.
© copyright cooldenim.co.uk 2026; all rights reserved