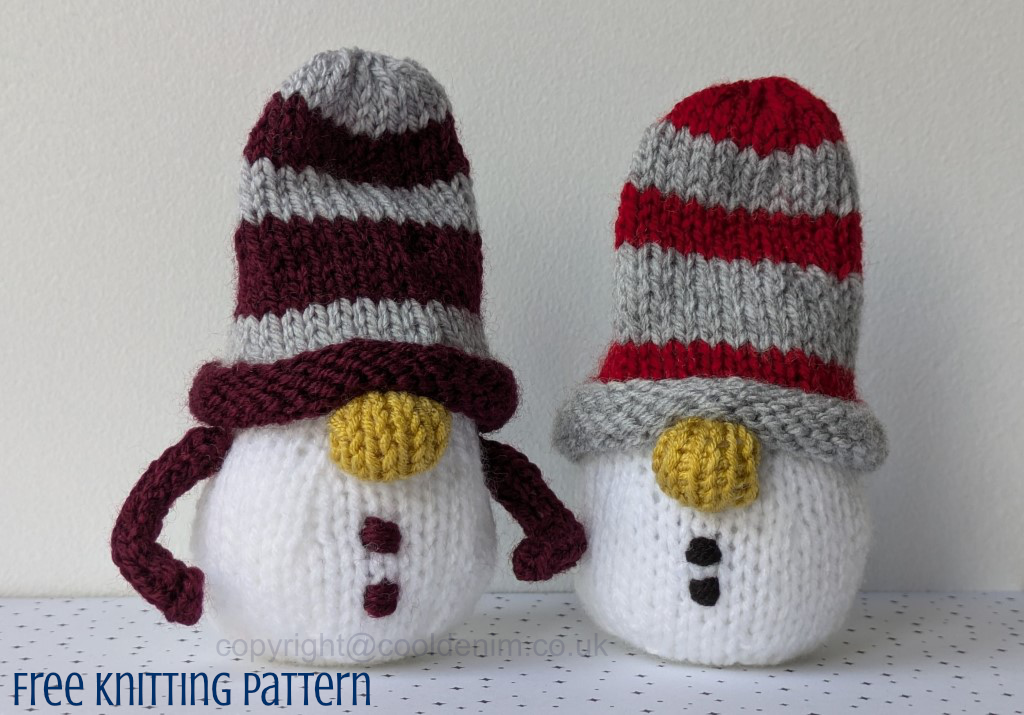
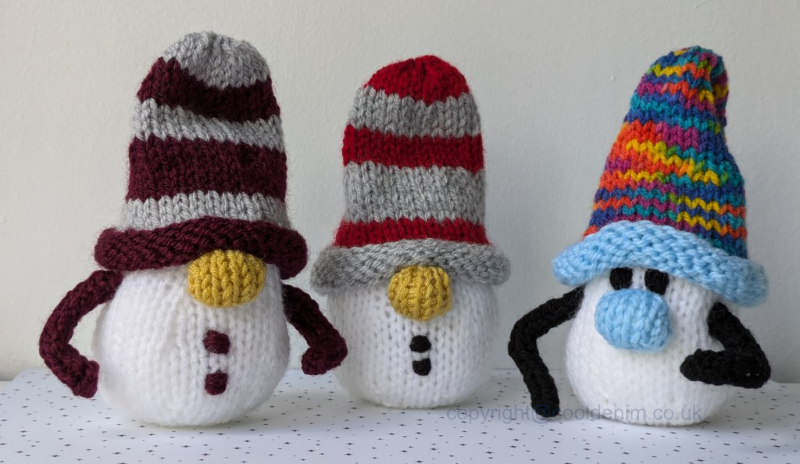
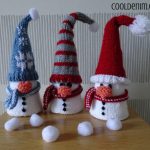
Free Knitting Pattern for snowmen with beanie hats. The large snowman is easy to knit up. The small snowman has arms but can be knitted without. They look good in a group using different colours and features. Use colours out your stash to make winter snowmen, or reds and greens to make them Christmas Snowmen. Pattern below is the small snowmen.
Knitting Pattern and Instructions
Sizes
Approximate finished size – height 13cm (5.25 inches) with hat (hat designed to be left high)
8cm (3.25 inches) without hat
Width 6cm (2.5 inches)
Materials
3.5mm needles, DK Yarn (double knitting)
White for the body. 2 colours for the striped hat (shown in red and grey). Small amount of another colour for the nose (shown in yellow).
Pipe cleaner (if making with arms) – Optional circle of card, approx. 3cm. Toy Stuffing.
Abbreviations
KF&b – Knit into the front then back of the same stitch (increases stitch count by one)
K2tog – Knit 2 stitches together
Rep – repeat (pattern shown in brackets)
If there is a change in the number of stitches, then the number of stitches you should have on your needle is shown at the end of the row in brackets.
© copyright cooldenim.co.uk 2024 designer: creativeneats; all rights reserved.
Not to shared or distributed without express consent.
Pattern:
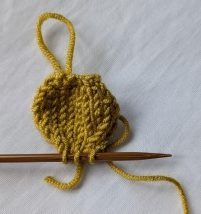
Body – (In White)
Cast on 8 Sts
K1, KF&b x 6, K1 (14sts) – Purl row
(K1, KF&b) repeat to end (21sts) – Purl row
(K2, KF&b) rep (28sts) – Purl row
(K3, KF& b) rep (35sts) – Purl row
Knit row, Purl row
Knit row, Purl row
Knit row, Purl row
(K5, K2 tog) rep (30sts) – Purl row
Knit row, Purl row
(K4, k2tog) rep (25sts) – Purl row
Knit row, Purl Row
(K3, k2 tog) rep (20sts) – Purl row
Knit row, Purl row
(K2, k2 tog) rep (15sts) – Purl row
(K1, K2 tog) rep (10sts) – Purl row
K2tog x 5 (5sts)
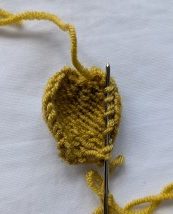
Cut a longtail, thread your needle and pull through the remaining stitches to finish off.
Fold in half (right sides together) and sew the side seam leaving a gap at bottom for stuffing.
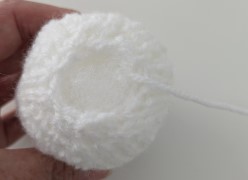
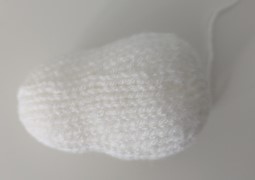
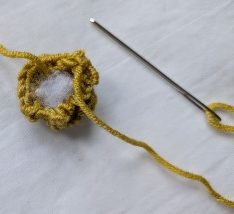
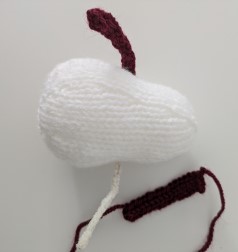
Stuff quite firmly, you can place an optional circle of card approx. 3cm in the body before closing the final seam. This makes the snowman stand better but is optional. Finish the seam by gathering stitches around the edge of the remaining opening and pulling firmly to close. Shape the body lightly with your hands, it should look like the image below.
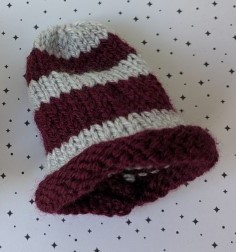 Hat – (Shown in Red and Grey)
In Red (Rim colour) – Cast on 36 Sts – Purl row
(K8, KF&b) x4, (40sts) – Purl row
Knit row – Purl row
(K2tog, K8) x 4, (36sts)
Change to grey (2nd Colour) – (wrongside facing)
Knit row – Purl row
(K2tog, K7) x 4, (32sts) – Purl row
Change to red – Knit row, Purl row,
Knit row, Purl row
Knit row, Purl row
Change to grey – (k2 tog, k6) x 4, (28 sts) – Purl row
Knit row, Purl row
Change to red – Knit row, Purl row
Knit row, Purl row
Change to grey – (k2 tog, k5) x 4 (24sts) – Purl row
Knit row, Purl row
(K2tog) X 12 (12)
Cut a long thread and pull through remaining 12 stitches tightly
Fold right sides together and sew the side seam, matching the stripes as you go. Turn right side out.
Nose – (Shown in Yellow)
Cast on 3 Sts.
KF&b x 3, (6) – Purl row
K1, KF&b, K2, KF&b, K1 (8) – Purl row
Knit row, Purl row
K1, K2tog, K2, K2tog, K1 (6) – Purl row
K2tog x 3 (3) – Cut yarn leaving longtail and pull through remaining stitches.
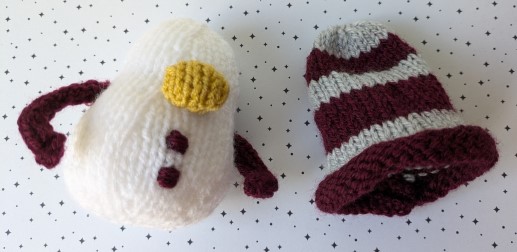
Weave/gather stitches around the edge of the circle, stuff lightly and pull up to form a ball. As shown in the images.
Note – Put the hat in place and sew the nose to the body. The hat just makes it easier for the placement of the nose and the arms in the next step.
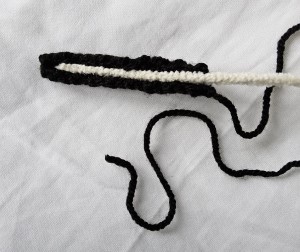
Arms – (shown in dark red)
Cast on 4sts
Work 15 rows in stocking stitch and cast off Leaving longtail for sewing.
Wrap around the pipe cleaner and seam the open edge.
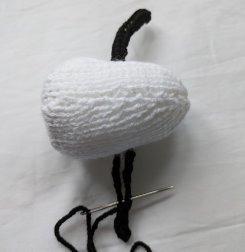
Now push the uncovered end of the pipe cleaner through the body of the snowman. Use a knitting needle to push through first which helps make a gap so the pipe cleaner will go through. You can also use a large needle or bit of thread to pull through. Pull this through to where you knitted arm begins.
Now knit a second arm to wrap around the exposed pipe cleaner, seam this the same as the first. You may need to adjust the number of rows or cut the pipe cleaner here depending on the length of your pipe cleaners. See images below.
 To finish – Using scraps of yarn, embroider buttons and eyes if required. Personalise your Snowman.
Copyright @ cooldenim.co.uk 2024; all rights reserved.
Not to be shared without express permission from cooldenim. Pattern or knitted items as a result of this pattern not to be sold or distributed.

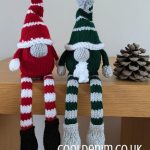
do you have details for the large snowman ⛄️
Hi, The pattern for the large snowman is here https://cooldenim.co.uk/index.php/2024/09/05/large-snowman-with-beanie-hat/
hope this helps.
The pattern for the snowmen is adorable and seems quite straightforward. I love the idea of using different colors to create a festive group of snowmen. The instructions are clear, but I’m a bit confused about the last row of the hat—could you clarify if there’s a missing row or if the stitch count is intentional? Also, how do you suggest adjusting the pattern for thicker yarn? I’d love to see a photo of the finished snowmen to get some inspiration! What’s your favorite color combination for these little guys?
Hi, the last row of the hat leaves you with 12 stitches which you then pull through to finish. Depending on the thickness of your yarn you can add an extra K2tog row across these 12 stitches to reduce it to 6 stitches if required. I haven’t tried it with a thicker yarn and larger needles yet! There are images of the finished snowmen in the post.
Bonjour Merci beaucoup pour votre partage , c’est vraiment mignon et facile à traduire en français
Confused with the last row of the hat! There are 24 stitches and you have to K2tog x 12 and in brackets it states 6 and you have to pull through the remaining 6 sts but there are 12 stitches left. Is there a row or 2 missing from the pattern?
Hi Pamela,
Thank you for your message. It should state pull through the remaining 12 stitches and pull tightly. I will amend this, thank you for sharing this and I hope you managed to finish it ok !
Yes thanks, I’m knitting 23 if them and did add an extra decrease row to get to 6 stitches but I haven’t sewn them up so can alter them. I give them to my daughter (primary teacher) to add to the kids Christmas
Hi Pam have sent you an email direct. However for other visitors … I have tested this and have found that on the last few rows of the hat where you pull through the last 12 stitches, if you reduced this down to pull through 6 stitches it doesn’t affect the overall look either way. You could do an extra decrease row (when you have 12 stitches K2tog x6 to reduce to 6) or substitute one of the other final rows with this extra decrease row. It also depends on the yarn/thickness of yarn being used. Hope this helps and Pam good luck with the knitting, would love to see a photo if you have the chance.
These are cute. I’m confused where it says at the end of each row purl row. What does this mean?
Hi Maria,
So after you have finished doing the knit row (these always have the shaping in) turn you work and then do a purl row. So basically after a knit row there is always a purl row. It just doesn’t state to turn the work, I hope this helps.
Thank you
Thank you for this pattern!
Very cute. Thank you for sharing.
Thankyou. I found it now.