This is a pattern/instructions for you to create crochet storage tin cans. They are beginner friendly and worked in continuous rounds, the only stitches used are a single crochet stitch and a single crochet increase (U.S single crochet). The pattern and instructions show how I arrived at the designs shown in the images and work for any size can/tin you want to cover. Open for creativity using up stash yarn and your favourite colours. By using empty cans you get a nice sturdy pot (rather than a floppy structure) useful for needles, scissors, pens and pencils.

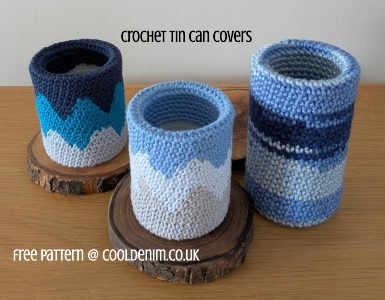
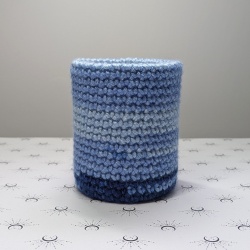
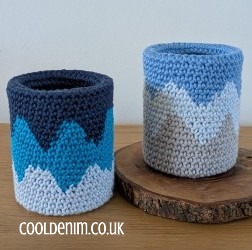
The two in the left of this image remind me of paint drips. I was experimenting with colour changes in crochet (as there are many ways of doing this !) and really liked the way it turned out doing a simple colour change whilst working continuous rounds. The colours are never stacked as they are when working flat or by closing each round with a slip stitch, this creates a more random pattern not as sharp. I really liked this effect, if you imagine trying to create flags or points with your colour when working in the round this just happens!. Each one is different and unique. Multi coloured yarns also work particularly well for this project as you get different colours and results without the effort. (tall can right in above image shown using Caron Saturday Jeans colour)
Make them plain, use multi yarn or just enjoy the colour changes and freeform results, a unique and personalised way of using up stash yarn.
Techniques used:
- SC – single crochet (pattern written in US terms)
- Inc – increase by crocheting 2 stitches into the same stitch
- Mc – starts with a magic circle or the method you use to start a circle in crochet
- Dec – You may need a decrease depending on the tins you are using, decrease 1 stitch by crocheting 2 stitches together
- Worked in continuous rounds using a marker for reference.
- Images used Sirdar Happy cotton yarn with 3.5mm hook (tall pot was an Aran weight yarn with a 4.5mm hook)
Use any stash yarn you have. Size down half a hook size to the recommended one on your ball band, this way the tin can doesn’t show through, if you crochet loose then maybe go down a whole size.
Instructions and Method
Start by making a magic circle with 6 stitches. Use a marker to help count rows.
Round 1. Increase in every stitch (12 stitches)
Round 2. (SC1 stitch and increase in next) repeat this 6 times (18 stitches)
Round 3. (SC2 stitches and increase in next) repeat this 6 times (24 stitches)
Round 4. (SC3 stitches and increase in next) repeat 6 times (30 stitches)
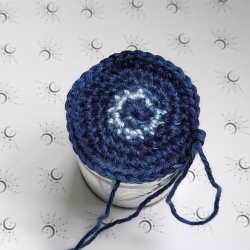
Continue to increase in each round in this way (increasing each stitch count between the increases) until your circle fits over the base of the can. It needs to cover the bottom completely otherwise your can won’t fit inside. (see images below)
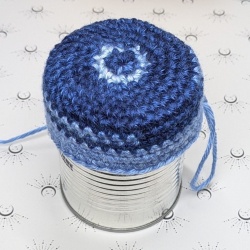
When you have reached this stage then just work single crochet in continuous rounds, move marker up as you go. Continue until you reach the top of the can then continue until you have enough to fold over and push inside. I worked approx 4cm/1.5 inches past the top for a neat finish, fasten off the work and then push it firmly over and into the sides for a nice smooth top.
To crochet a base for inside. Repeat the process used to start, make a circle, fasten off and push inside using a pencil.
 |
 |
 |
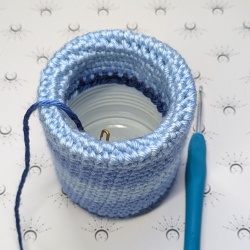 |
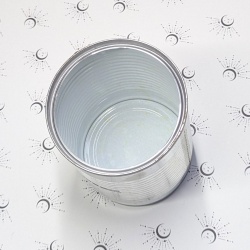
Start with you clean tin can. |
Crochet a circle increasing stitches until it covers the base. |
Now continue in continuous rounds working to the top of the tin |
Continue until there is enough to go over the top and inside the tin. |
 |
 |
 |
 |
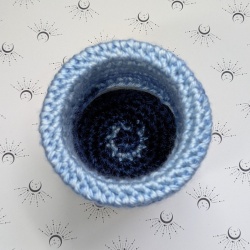
If using the tin for storing needles and scissors. Crochet another base to push inside the tin to protect the ends. |
Completed tin looking in from the top. |
Can using multi colour yarn. |
Tin cans using scraps of colours and changing colours. |
© copyright cooldenim.co.uk 2026; all rights reserved. Design: Creativeneats.