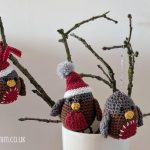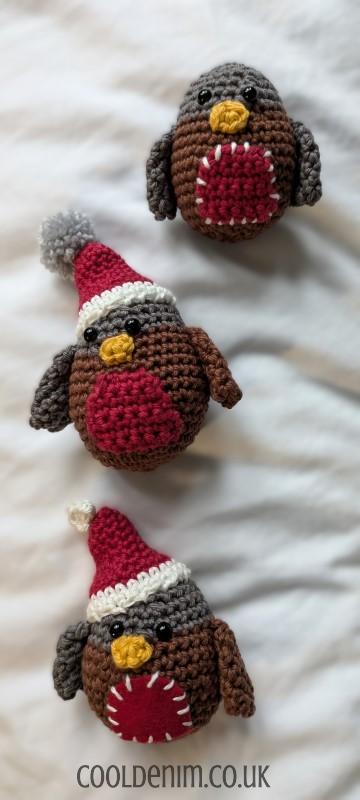
A crochet/amigurumi pattern for a Christmas Robin (choose to make with or without hat and other options). This pattern came about whilst designing another pattern! ….. I made another and noted it down to enable me to share with you in time for Christmas. Its an easy little crochet assuming you have some experience, the techniques include being able to work a magic circle, single crochet stitches, increases and decreases. Depending on your preference, level of expertise and time available there are various options of finishing/sewing. Please visit the section on how to… crochet Christmas robins for options and images. I try to make my patterns as accessible as possible for everyone to have a go. Beginners and intermediates can make these robins. Happy making!
The Pattern is written below and there will be a pdf available soon, this will include full instructions along with images, helps on rows, sewing together and the different options of finishing.
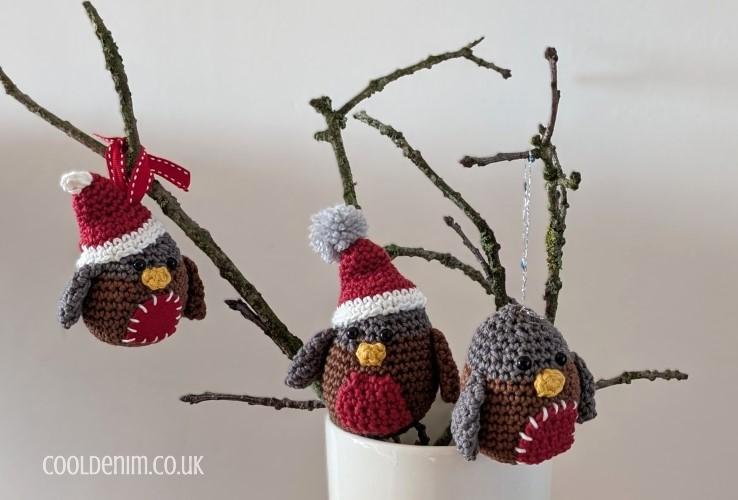
For those with some crochet experience and are used to constructing amigurumi projects the pattern is below. I hope you enjoy making this little robin. I was gifted a box of the sirdar happy cotton with all sorts of colours in it and will be trying to use some of the more unusual colours in future patterns.
My design is written in US terms of crochet. It uses only single crochet stitches so is easy to adapt.
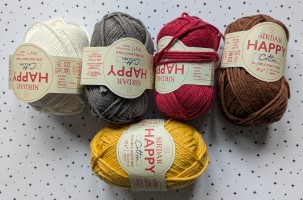
Materials: The robins were created using Sirdar Happy cotton yarn and a 3.5mm crochet hook. The toy eyes used are 6mm. Needle, scissors and toy stuffing also required.
Christmas Robin Crochet Pattern
Abbreviations:
Mc – magic circle
Sc – Single crochet
Dec – decrease 1 stitch by working 2 stitches together
Inc – increase 1 stitch by working 2 stitches into the same stitch
Foff – fasten off
Slp St – slip stitch
© copyright cooldenim.co.uk 2024 designer: creativeneats; all rights reserved.
Not to shared or distributed without express consent.
Beak – In Yellow (The beak is made first as it will be sewn to the body in the next part.)
In Yellow
Start with 4 Sc in Magic circle
slip stitch back into the magic circle and fasten off. Pull both ends of yarn firmly.
Body – In Brown (worked in continuous rounds)
Start with 6 Sc in Magic Circle (6)
Round 1. Sc inc x 6 (12)
Round 2. (Sc 1, inc) x 6 (18)
Round 3. (inc, Sc 2) x 6 (24)
Round 4. (Sc 5, inc) x 4 (28)
Rounds 5-7. 3 rounds of Sc
Round 8. (inc, Sc 6) x 4 (32)
Round 9 & 10. 2 rounds of Sc
Round 11. (Sc 6, dec) x 4 (28)
Round 12. Sc round – change colour to grey at end of last stitch ready for next row
Round 13. (In grey) (Sc 5, dec) x 4 (24)
Round 14. Sc round
Round 15. (Sc 4, dec) x 4 (20)
Round 16. Sc round
Round 17. (Sc 2, dec) x 5 (15)
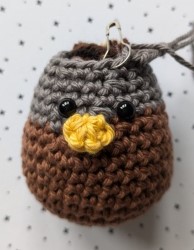
Pull the stitch on your hook in a big loop so as not to lose it, we now need to attach the beak and the eyes before continuing.
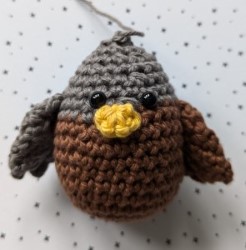
Sew the beak onto the body where the colour change is. Attach the eyes just above with 2 stitches in between the eyes. See images to help with positioning.
Now stuff the body quite firmly to make a nice shape and continue with the next rounds to close the top.
Round 18. (dec, Sc 1) x 5 (10)
Round 19. Decrease stitches until you run out or it becomes too fiddly, then just pull through the remaining stitches with your thread and fasten off. I managed 3 decreases and then fastened off.
Belly/ Red Breast (if making in crochet) – If using red felt omit this part.
To start make a chain of 7
1. In 2nd chain from hook (1st proper chain so not the one on the hook), Sc 6, chain 1 and turn
2. In 1st chain from hook (1st stitch), Sc 6, chain 1 and turn
3. In 1st, Sc 6, chain 1 and turn
4. In 2nd, Sc 5, chain 1 and turn
5. In 2nd, Sc 4, slp st into the last which is top of the row below, chain 1 and turn
6. In 2nd, SC 3, slp st into the last which is top of the row below and fasten off.
Sew the belly to the body and continue to make the wings.
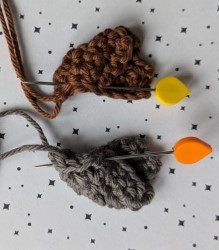
Wing – Brown or Grey (make 2) Images show one in brown and one in grey.
To start make a chain of 8
1. In 2nd chain from hook (first proper stitch) Sc 7, chain 1 and turn.
2. Starting In 1st stitch, Sc 7, chain 1 and turn
3. Starting in 1st stitch, Sc 7, chain 1 and turn
4. Starting in 1st stitch, Sc 6, chain 1 and turn.
5. Starting in 2nd stitch, Sc 5, chain 1 and turn.
6. Starting in 1st stitch, Sc 4, chain 1 and turn.
7. Starting in 2nd stitch, Sc 3, chain 1 do not turn.
8. Now work across the left-hand side of your work so we turn it in our hands but not turn it over Sc 4 across this edge, there are four holes which are the end of the rows. (The last stitch is where we started.) Fasten off.
Fold the wings. Fold the two straight edges together, sew a small seam to hold with one of the ends of yarn, use the other to attach the wings to the body. The fold becomes the front of the wing. Attach to the body where the change of colour line is.
Hat – In Red (worked in continuous rounds)
Start with 6 Sc into magic ring (6)
1. inc, Sc 2, inc, Sc 1, inc (9)
2. Sc 1, inc, Sc 3, inc, Sc 3 (11)
3. Sc round
4. Sc round
5. Sc 1, inc, Sc 4, inc, Sc 4 (13)
6. Sc1, inc, Sc5, inc, Sc5 (15)
7. inc, Sc3, inc, Sc3, inc, Sc2, inc, Sc3 (19)
8. Sc 1, inc, Sc 3, inc, Sc 3, inc, Sc 3, inc, Sc 3, inc, Sc 1 (24)
Change colour to white
9. Sc round (24)
10. inc, Sc 11, inc, Sc11 and then fasten off.
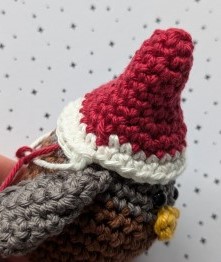
The hat should resemble a thimble shape with a flare to sit on top of the robin.
The colour change sits to the left of the left wing.
Bobble – In White
To Start Sc 6 into Mc.
Slip stitch back into centre, fasten off and pull up both ends tight. Attach this to the top of the hat.
Position the hat with the colour change from red to white just above the left wing at an angle as shown in the image. Sew to the body to secure. Attach ribbon or thread through the hat to hang.
Please visit the how to… crochet Christmas robin section for more ideas on finishing. The suggested options will help make them faster or easier to make with various ways of finishing. A full instructional .pdf will be available soon.
Copyright @ cooldenim.co.uk 2024; all rights reserved.
Not to be shared without express permission from cooldenim. Pattern or knitted items as a result of this pattern not to be sold or distributed.
